When you want to set up a form for collecting contacts on a website, there’s usually the two most common options available to go with – the PHPmail() or SMTP authentication functions.
If you go with the PHPmail() option, the function sends emails on behalf of the server that your domain is hosted on. In this case, there is also no need to create a separate email address, since the server does not require it to be used in the From field.
The other option, the SMTP authentication method, allows the advantage of using an email account coming from a third-party with your contact form. The key thing to utilize this, is to configure all the settings correctly.
In this article, we will talk about how to set up a contact form using both of these functions, in different CMS.
Joomla
Local email box
It should be noted that Joomla uses the PHPmail() function by default. As it is, setting up a local mailbox is rather simple. To adjust this, you will need to through this route:
Control panel -> Configuration -> Global menu.
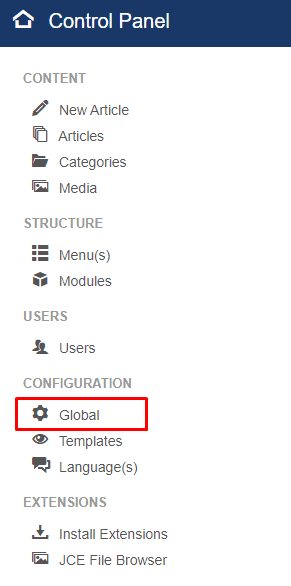
From the Global section head on to Server settings

Afterwards, scroll down until your reach Mail settings
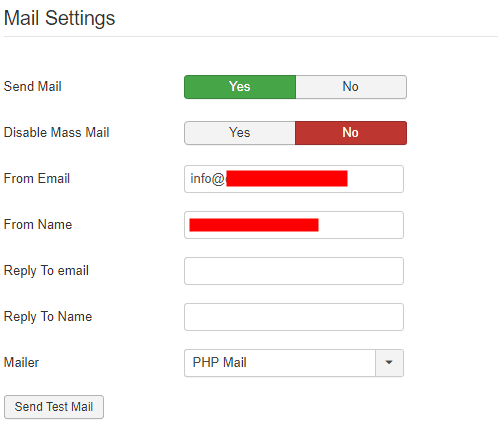
Here you can see and adjust your email settings.
After the setup, you’ll want to test if everything is working correctly. To this, simply press the Send test mail button near the bottom of the section.

You should be prompted with a message like this:
![]()
In the Joomla local inbox you’ll see an email that looks something like this.

Third-party mailbox
Like already mentioned, for third-party compatibility, you will need to use the SMTP function.
Here’s how to do it:
- Head back to the Global menu. Control Panel -> Configuration -> Global.
- Then, again to Mail settings. Server -> Mail settings.
From here you’ll need to just the mailer settings from PHP to SMTP:
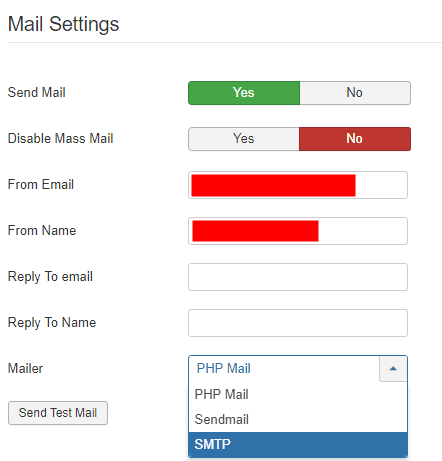
After you select SMTP, you’ll see a few additional setting fields pop up. You’ll need to configure the settings in this way:
- Send Mail: Yes
- Disable Mass Mail: No
- From Email: The account you want to send mail from.
- From Name: Customize your sender name, the way you see fit.
- Mailer: SMTP
- SMTP Host: the server which you will use to send mails from
- SMTP Port: 465 for SSL, 587 for TLS
- SMTP Security: SSL or TLS
- SMTP Authentication: Yes
- SMTP Username: the account you will be sending the emails from.
- SMTP Password: the password for that account.
In the next, you’ll want to once again verify the set up. Click the same button, for Send Test Mail, like you did before.
You’ll see a similar prompt like you said before:
![]()
In the receiving account (in this example, a gmail account) you should receive a message looking similar to this.

Creating a new user in Joomla for testing SMTP
Another way to test if SMTP works is to create a new user in Joomla.
From the main menu, select Users -> Manage -> Add New User

In the user tab, fill out the details like this:
Fill in the following fields in the Account Details tab:
- Name: the name you want to give to the user
- Login Name: the login of the user
- Password: a password for the login
- Confirm Password: confirming the password
- Email: email of the user
- Receive System Emails: set to yes
And then press Save.
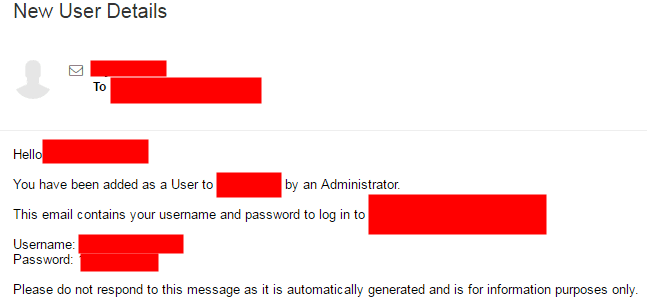
You should get an email that looks something like this.
PrestaShop
Local mailbox
Just like in Joomla, Prestashop has the PHP mail() function enabled by default. This means you can use it for a local mailbox set up. It’s functionality can be tested using the Contact Us menu on a PrestaShop website.
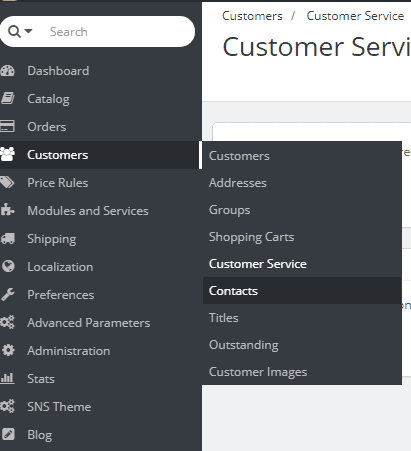
The email for customer service can be edited by heading to Customers -> Contacts.
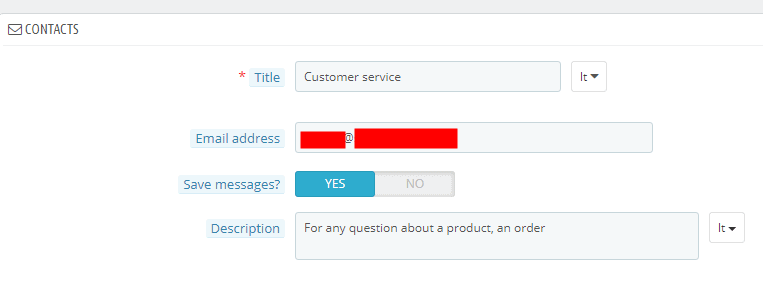
Next, select the Customer Support email that you want to change by clicking Edit

Third-party option
If you want to connect PrestaShop with a third-party email, you will need to do the following steps.
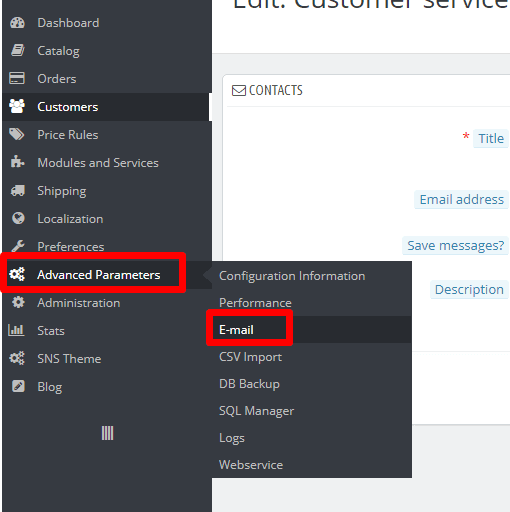
From the main menu head to Advanced Parameters and then Email.
Scroll down below the list of Emails and you should see the Email menu. From here, select the second option – Set my own SMTP parameters.
A configuration field should then pop-up below.
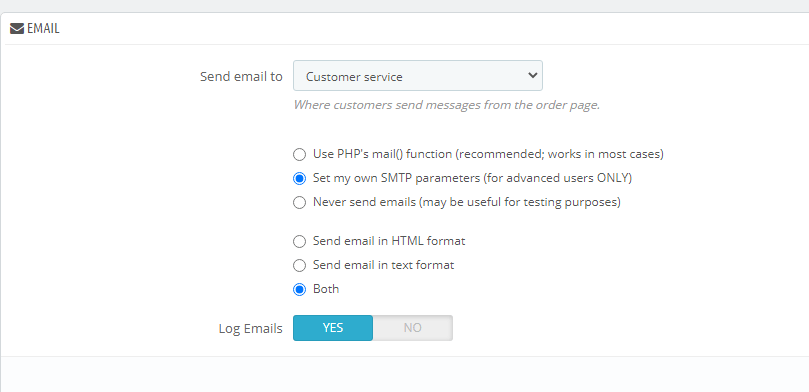
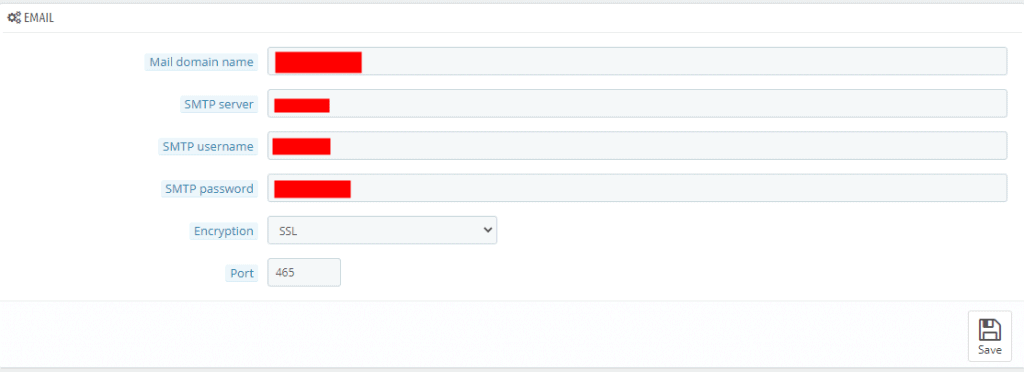
You will need to adjust the configuration settings like this:
Mail domain name: domain of your website
SMTP server: the server which you will sending emails from
SMTP username: account you will be sending emails from
SMTP password: password for the email
Encryption: either SSL or TLS
Port: 465 for SSL, 587 for TLS
Afterwards, you’ll want to test if everything works correctly. You can do that from the Send a test email section.

Of course, don’t forget to save all of the changes you’ve made.
The recipient, meanwhile, will receive a message looking something like this.
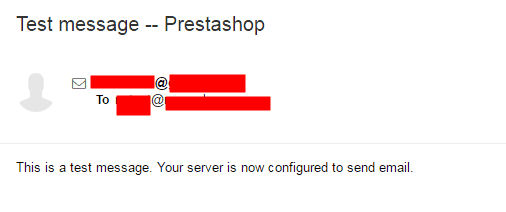
This will be followed up by an automated letter saying that the SMTP settings are correct.


