 CMS Made Simple is a wonderful platform for creating websites that are simple, yet effective in their design and functionality.
Despite not being as popular as CMSes like Joomla and WordPress it still has an avid fan base as a result of its reliability and ease of use for both casual web developers and full blown professionals.
In this article we will focus on the process of updating your CMS Made Simple platform. Since it isn’t a one-click process, some may find it a bit challenging, so, this guide is here to help.
Before you update – create a backup of your website
Creating a backup is standard practice in any type of web development, regardless of platform. In case something goes wrong while updating, you will have a backup version of your CMS Made Simple website just in case.
To create a backup for your CMS Made Simple website what you need to do first is download all of your site files which are located in the same folder that contains your scripts.
You have to do this via an FTP program (FileZilla for example). Afterwards store the files in a folder on your PC or external device.
One other thing you need to do is to export your CMS Made Simple database to a folder somewhere on your PC or external device as well. This is done via an app called phpMy admin.
After you’ve stored a copy of your files and database somewhere secure, you’ve completed the backup.
Proceeding with the CMS Made Simple upgrade
1. Download the latest CMS Made Simple package and upload its files
After you’ve done with your back up, you’re ready to move on with the first step of the actual update.
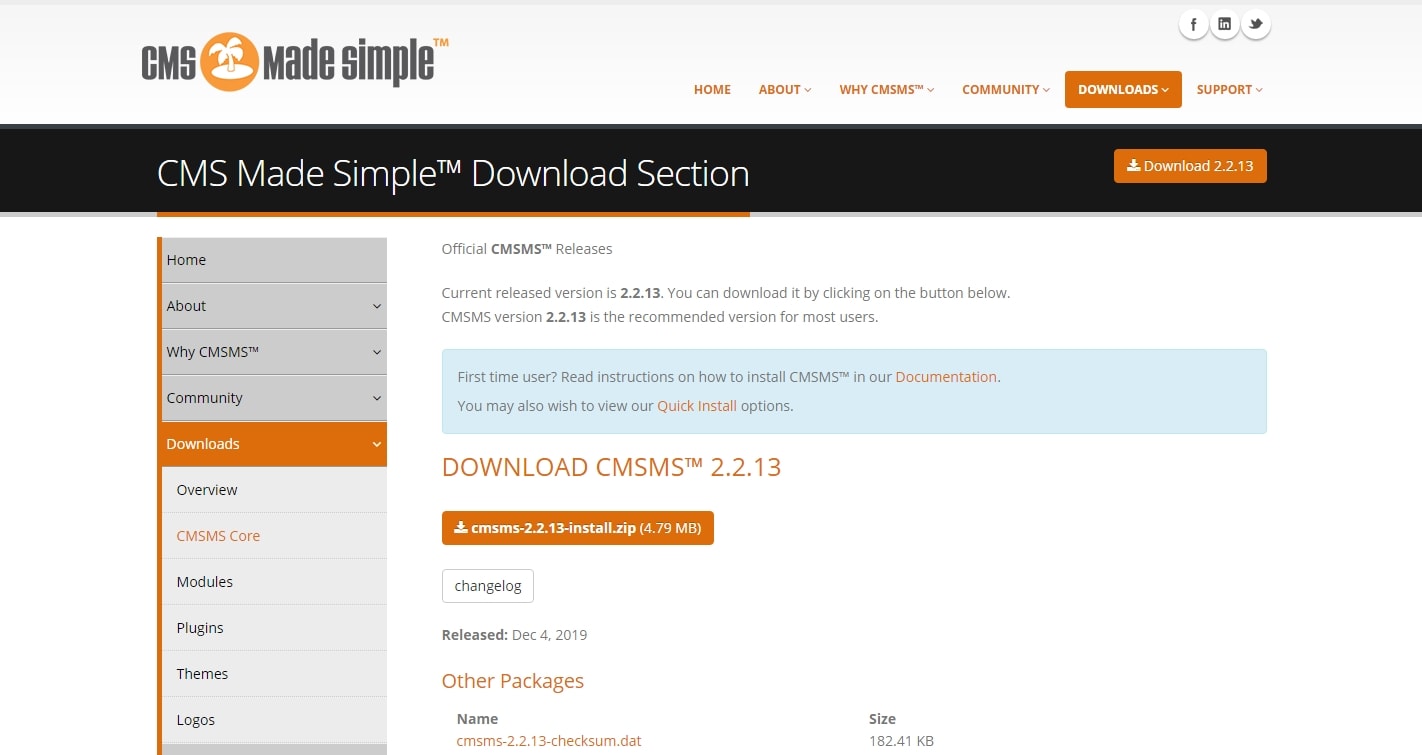
Go to https://www.cmsmadesimple.org/downloads/cmsms/
This will lead lead you to the CMS Made Simple Dowload Section which look something like this:

After you’ve done with your back up, you’re ready to move on with the first step of the actual update.
First, go to: https://www.cmsmadesimple.org/downloads/cmsms/
From here, you’ll need to download the latest CMS Made Simple package (the Zip file).
After the download, you’ll need to extract the files from the package and upload its contents to your CMS Made Simple directory via an FTP program.
An important note: This action will overwrite the old core files of your website with new ones from the latest CMS Made Simple package.
Since you already have a backup version of both your old files and old database, you can upload these new ones without hesitation. If an unlikely error occurs, you have a replacement backup ready just in case.
2. Initiate the update menu
After you upload your new core files, you need to go to:
https://yourdomain.com/install/upgrade.php (replace the yourdomain.com part with your own domain of course).
By typing this you will proceed to the Install/Upgrade System, from there which you’ll continue the update with guidance from the CMS itself.
There’s nothing special on the first screen, just the option to select your CMS Made Simple language for the update menu and preference of language on your website.
If you prefer English, just leave it as it is since en_US is the default language package for CMS Made Simple.
3. Verify the integrity of your website
The second step necessary after launching the upgrade system is to run an integrity check for your CMS Made Simple.
All you need to do here is download a .dat file from the CMS Made Simple downloads section (the same one where we downloaded our package from), select it using Choose File and then pressing Test.
This step is needed to make sure there are no errors with your upload CMS Made Simple files.
Once finished, press Continue.
4. Checking on the versions of your various site settings
On the next screen you’ll see two tables which include the recommended and required settings you need to have in order to successfully update/install your CMS Made Simple.
Make sure that every tool or setting has a green tick next to it, meaning it’s ready for the new version of CMS Made Simple.
If there are no errors here, proceed by pressing Continue.
5. Clearing the cache, updating the database and modules
The system will then clear your website cache (anything that might have been from your previous site version) and will also display a green tick after the process is done.
Press Continue.
Within the last two pages, the system will check if any Updates regarding your CMS database and core modules respectively.
If any of them are necessary, give the system some time to upgrade them until you see the green ticks once more.
On the last page, you’ll see a display message – “Upgrade process complete”.
Congratulations, you’ve successfully upgraded your CMS Made Simple website.
In conclusion
Updating CMS Made Simple is a process that requires some time, however, it can be done pretty easily if guidelines are being followed.
Since the CMS Made Simple community is pretty huge, updates are frequent for the platform and keeping up with the latest is key for a properly functioning CMS Made Simple website.
Need assistance with your CMS Made Simple? Perhaps a custom solution specifically for your site? Don’t hesitate and drop us a line today, our team we’ll be sure to find the best one for you.

